How to Generate PDF Reports from a Mobile Device

The deskless worker makes up relatively 80% of today’s global workforce. That’s about 2.7 billion workers who actively spend their time outside the traditional office setting — whether that be on the road, on the water, in the field, in the sky, or even underground.
Despite cloud-based offices becoming seemingly commonplace, the distributed workforce remains far underserved in terms of technology available to support deskless operations. But that dynamic is beginning to shift rapidly with the latest developments in mobile-first technologies.
Mobility and connectivity are key to completing jobs successfully, efficiently, and of course, accurately. That’s why businesses across all industries are recognizing the benefits of equipping frontline employees with mobile forms.
At Device Magic, we’re focused on supporting the data collection process of every worker, regardless of their environment or working conditions. We understand the needs of the deskless workforce and their unique requirements to be successful in the field.
Mobile forms allow users to deliver results from inspections, checklists, and work order reports directly to your back-end systems. They can also be sent via email or text message to ensure the right person is notified, at the right time, should immediate action be required.
One of Device Magic’s most popular features is the ability to customize a PDF or Word version of your submission data.
This feature can be helpful in many situations; maybe you already have your own form and want to replicate the way it looks exactly with Device Magic. Or maybe you don’t currently have company branded forms, like invoices or service orders, and you want to give them a more professional look.
The next time you need to generate a proposal or bill a customer while onsite for work performed or goods supplied, you can do so right from your mobile device. All while sending the recipient(s) a neatly-formatted PDF invoice with your company and payment details.
Learn more below on how you can use Device Magic to easily build and send PDF reports generated from any iOS or Android device.
Step 1: Designing Your Form
Launch the Form Builder
Once you’ve created an account, log into the dashboard via web browser. Navigate to the left side of you screen and select the “Forms” tab.
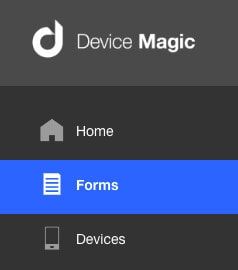
Click the “New Form” button to launch the designer with a blank form. If you wish to skip the how-to steps, you download our JSON template here and use the Import button to load that now.
Add a date field and Customer Details subform
Although you can access the date/time a form was submitted from your submission history, it probably makes sense to remind the device user that they are submitting this information and can optionally override the date from today’s date. Drag a Date field from the toolbox and name it “Date”.
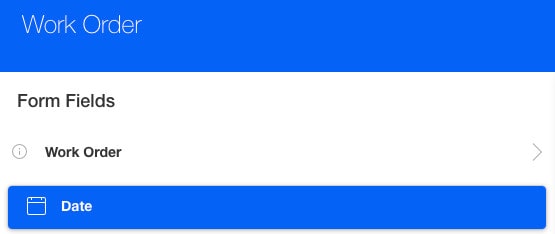
For the customer details, it probably makes sense to section these off into a Subform, so begin by dragging a subform from the toolbox below the Date field. Add two text fields for Name and Address, an integer for ZIP Code and a Phone No field called “Phone No.”
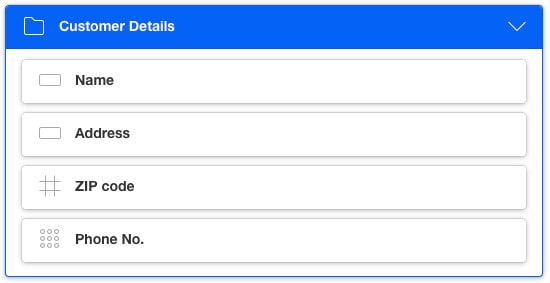
Your subform should look something like the above.
Adding the Work Items repeat group
A repeat group field allows the device user to capture any number of line items into the form and this is exactly what we need here, as it’s impossible to know beforehand how many items of work will be completed or products sold. Within the repeat group you can include any of the regular form fields. So start by dragging a repeat group field into the form below the customer details subform like so:
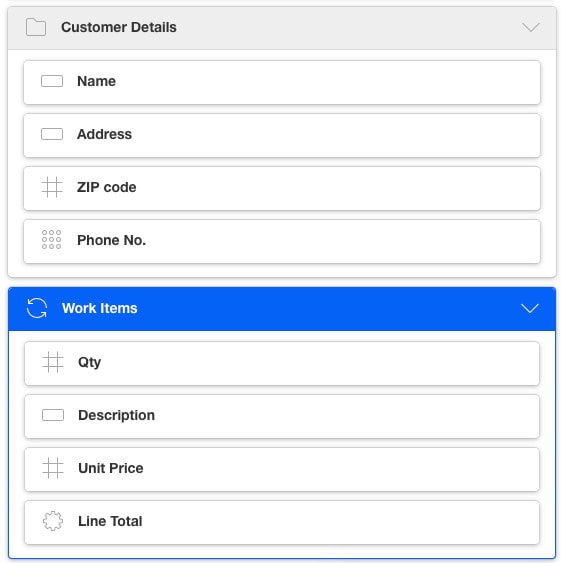
Before we add the items, use the Properties window on the right to set a title for the repeat group; call it “Work Items”. Now, add the following fields into the Work Items repeat group by dragging the fields into the group area:
- Qty – Integer field
- Description – Free text
- Unit Price – Decimal field
- Line Total – Calculated field
For the Line Total, we want to multiply the quantity by the unit price. Using the Properties window with the Line Total field selected, set the Expression for the calculation:
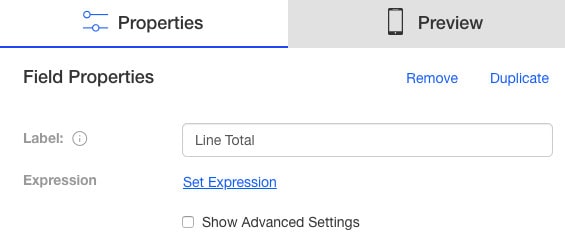
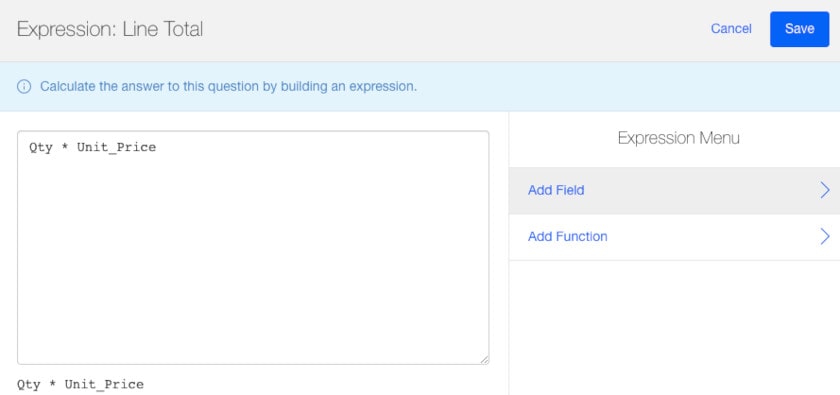
You now need to enter the expression as follows: Qty * Unit_Price
If you’ve named your fields differently, use the “Add Input” button to select your quantity field, then type “*” to denote multiplication, then insert your unit price field. That completes the repeat group!
To make things easier on your mobile users, you may want to replace the Description Free Text field with a Resource Lookup.
One nice touch is to set a Summary Expression for the Repeat Group. This is the text you will see once you’ve finished editing the Repeat Group item and have gone back to the main form. By default it will just say “Edit”, but we want it to say something like this:
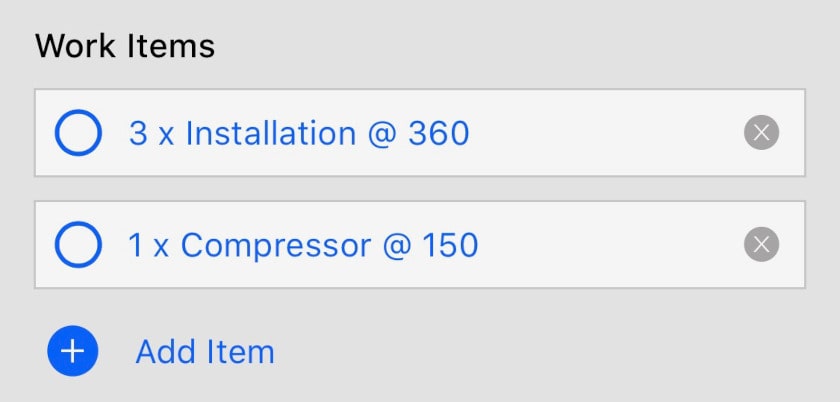
To accomplish this, make sure you’ve selected the repeat group by clicking it’s title, then under Advanced Properties, click the Set Summary button to build another expression as below:
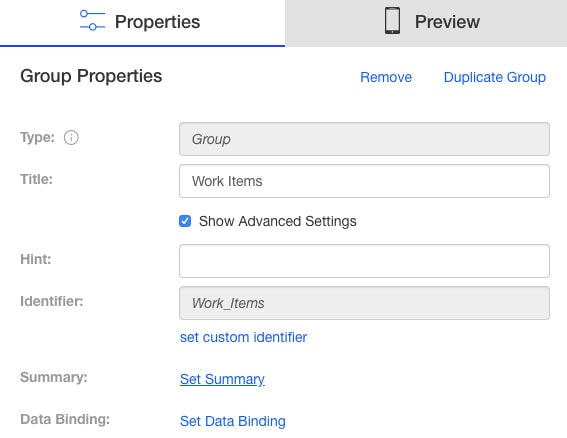
We used the expression: CONCATENATE(Qty,” x ” ,Description, ” @ “, Line_Total)
The CONCATENATE function allows you to join answers together, whether they be text fields, integers, decimals or even static text like the multiplication sign and other symbols I used above. Again, you could build these expressions or just type them in (just be sure to use the right field identifiers).
Adding up the bill and finishing off the form
So now that you have a set of line items, we need to total them up, apply any applicable sales tax and present a grand total. Start by adding three calculated fields to your form with the following titles and expressions, like you did above:
- Order Total – SUM(Work_Items.Line_Total)
- Tax – ROUND(0.14*Order_Total,2)
- Grand Total – ROUND(SUM(Order_Total, Tax),2)
Some key points:
- SUM can either SUM decimal/integer values found within your form, or it can be applied to items repeating in a repeat group. Our forms engine will figure that out.
- Pay attention to the dot notation used to access the Line Total’s value in the repeat group. It’s always safer to use “Add Input” button to be sure you’re getting the right field identifier.
- ROUND takes a decimal argument and optionally, a significant number of figures to round the value after the decimal point. This makes for neater-looking values.
Now add a Payment Method select field, with the values:
- Check
- Credit Card
- Account
Lastly, finish off the form by adding a signature field and title it “Customer Signature”. We will use this to have the customer give approval for the work done and invoice amount.
Step 2: Creating a dynamic PDF invoice to generate on submission
Now that the form is built, let’s create a neat and tidy PDF that we can either store or email to customers for payment. Start by adding a Destination to your form from the Forms page on your dashboard. Next, choose from the following information where you would like your form data to go.

Now, choose the Adobe .pdf from the list of Format options below.

From here you can upload your custom Word Doc template, or download one of our sample templates with your form’s placeholders.
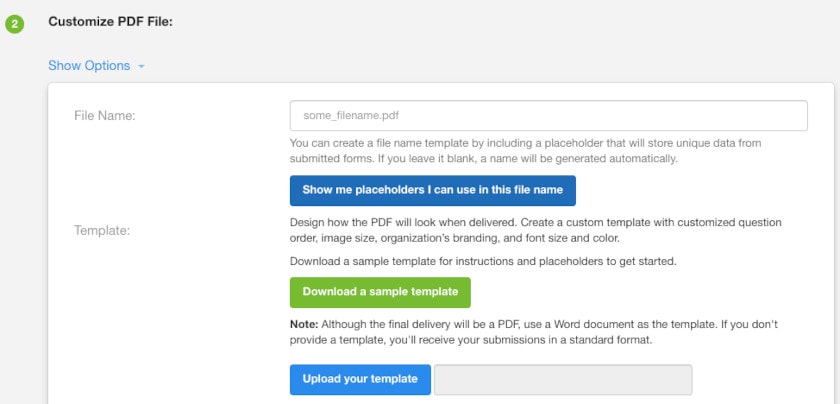
Once you’ve done this, you simply add your designated email(s) and select “Create Destination”.

This output provides a much more professional, consistent layout, with a difficult-to-edit result.
Ready to get started creating your own forms? Sign up for your trial account today.